Linisher vs Sander: Belt Sanding Compared for DIY
This comprehensive linisher vs sander guide compares belt sanders to other sanding tools, covering finish quality, material removal speed, dust control, safety, and practical tips for DIY floors and woodwork.

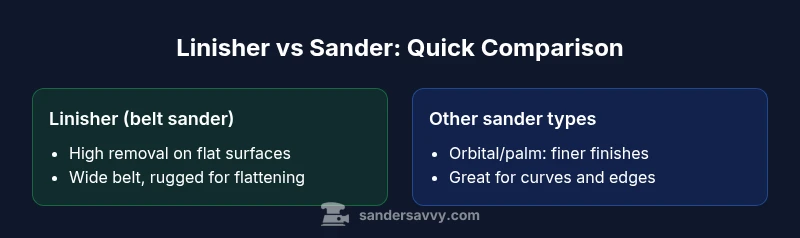
In a nutshell, the linisher (belt sander) and other sanders serve different finishing needs. Linishers excel at rapid material removal on flat workpieces and flush edges, while orbital and palm sanders deliver finer, swirl-free finishes on curved or detailed surfaces. The best choice depends on your project, skill level, and dust-management priorities.
What linisher is and how it differs from a general sander
According to SanderSavvy, the linisher is a belt-driven sander optimized for fast material removal on large, flat workpieces, while other sanders like orbital or palm sanders are tuned for finishing and detail work. A linisher typically uses a continuous loop belt that runs against a rigid platen, allowing aggressive stock removal with a predictable, flat surface when used with the right belt and pressure. By contrast, random-orbit and finishing sanders rely on orbiting or oscillating motion to minimize gouges and swirl marks, making them better suited for final finishes and curved shapes. In practical terms, if you’re leveling a stubborn workshop bench, removing old coatings from a wide plank, or flattening a table top, a linisher can deliver rapid progress. If your goal is a glass-smooth finish on curves, edges, or decorative elements, you’ll usually reach for an orbital or palm sander. The decision between linisher vs sander is not about one being universally better; it’s about matching tool geometry, belt options, and motion to the job at hand. When chosen and used thoughtfully, both tools can deliver professional results in a home workshop.
Key design differences that affect results
Material removal speed and surface flatness: belt-driven linishers have a wide belt and a rigid platen, which concentrates aggressive stock removal on flat surfaces. This makes them ideal for quickly leveling a shelf, dressing a table top, or removing finish across a wide area. Random-orbit and finishing sanders, by contrast, spread abrasive action over a small orbit, which reduces visible edge tracks and swirl marks but removes material more slowly on large flat panels.
Belt width, grit range, and belt life: linishers typically use longer, continuous belts with a variety of grits that handle rough removal to fine finishing. The choice of belt thickness and backing material affects belt life and heat generation. Orbital and palm sanders use interchangeable discs or pads with grits designed for smooth finishes; these are easier to control for delicate touch but wear faster under heavy stock removal.
Dust extraction and containment: a linisher with a good dust port and a robust vacuum connection can dramatically cut airborne dust on large projects. However, without a capable extraction setup, belt dust tends to escape along the belt edge and platen. The best practice is to pair any sanding project with a clean shop vacuum or cartridge dust collector and to keep the workpiece well supported to avoid kickback.
User experience and ergonomics: linishers are often heavier and bulkier, which can challenge control on edges and corners. Orbital sanders are generally lighter and easier to maneuver for beginners, especially on curved surfaces. Safety considerations include guarding, PPE use, and consistent hand positioning to prevent accidental gouges or burns from overheated belts.
When to choose a linisher (belt sander) for flooring and woodworking
On wood floors, a linisher can be used for bulk stock removal, leveling high spots, and removing old finishes, glue residue, and oxidation across large flat surfaces. It is most efficient when you have long, straight runs and a stable reference plane. For edge work where you approach door casings or transitions, a linisher can quickly produce a flat edge across a wide swath; however, you must be careful to avoid rounding corners or creating dips near edges. For cabinetry tops, tabletops, and large panels, a linisher speeds up the initial flattening stage and reduces the time spent with finer tools later. The key is to use appropriate grit progression and maintain consistent pressure to avoid creating hollows or peaks. The linisher’s speed and belt selection should align with the wood species and initial coating. In many cases, professionals reserve linishers for heavy stock removal and then switch to orbital or palm sanders for final finishing to achieve a premium surface without swirl marks. Safety steps include wearing a dust mask and using a respirator with carbon filters when sanding old finishes; keep the workpiece clipped and level, and never stand directly behind the belt path to avoid kickback.
When a different sander might be better (random orbital, palm sander)
Finish quality matters, and the orbital family shines when you must minimize swirl marks and produce a uniform surface on curved or irregular shapes. Random-orbit sanders combine a rotating disc with an eccentric orbit, which produces a random sanding pattern that reduces visible scratches and helps preserve surface texture. For finishing curved surfaces, table edges, and panels with detailed contours, an orbital or palm sander is often the better choice. In addition, finishing sanders can be lighter and easier to handle for long sessions, which reduces user fatigue and vibration. The key trade-off is speed: orbital sanders remove stock more slowly than a linisher but yield superior decorative finishes with less risk of gouging. For a project that started with a linisher bulk removal, you may perform the final pass with a finer grit on an orbital sander or a finishing sander to achieve a high-quality surface. Another factor is dust management; orbital sanders typically pair well with a cyclone or high-efficiency dust collector, which helps maintain a clean work environment and better air quality during long sessions.
Abrasive belts and grits: what to know
Choosing the right belt for a linisher is more nuanced than selecting discs for a palm sander. Abrasive belts come in various materials (such as aluminum oxide and zirconia alumina) with different backing fabrics and grain bonds. For coarse stock removal on hardwoods, start with a lower grit (e.g., around 40–60 grit) to knock down high spots and remove old coatings. Move up to mid-range grits (80–120) for leveling and flattening, then finish with finer grits (180–240) to prepare a surface for finishing. The belt choice should consider wood hardness, grain structure, and the presence of finishes or glue. Zirconia belts can run hotter and wear longer under heavy removal, but aluminum oxide belts are typically cheaper and widely available. It is crucial to inspect belts for glazing or loading; a loaded belt will leave deep scratches and heat the wood, risking scorch marks. A well-maintained belt will track more reliably and produce a flatter finish. You should also consider the speed setting on the linisher; higher speeds increase material removal rate but also heat and potential chatter, while lower speeds favor smoother finishes but prolong tasks.
Setup, safety, and technique tips
Proper setup and technique are essential for consistent results with a linisher. Before starting, inspect the belt for glazing, tears, and wear, and test on a scrap piece to confirm finish projection. Secure the workpiece with clamps or a non-slip mat, and use a straightedge or reference to keep surfaces true. Put on eye protection, hearing protection, and an approved respirator if sanding old finishes. Check belt tracking and tension—improper tracking can cause the belt to peel or drift, creating uneven results. Maintain a light, even pressure and move the sander in slow, controlled passes; never linger in one spot, which may burn the wood or deform soft edges. Keep the sander moving along the grain orientation where possible, and if you must cross grain, do so with gentler passes to avoid leaving deep scratch lines. When finishing, switch to a finer grit belt and reduce pressure to produce a smooth, uniform surface. For dust control, connect a quality vacuum to the dust port and wear a respirator for fine dust particles. Finally, practice on scrap wood to refine technique before committing to your actual project.
Maintenance, belts changing, and common pitfalls
Belts wear out with heat and load; track them regularly to prevent drift and uneven stock removal. Changing a belt on a linisher involves releasing tension, removing the old belt, cleaning the pulley surfaces, and installing a new belt with the grain direction aligned. After installation, recheck belt alignment and re-tension the belt before use. Keep the platen clean and free of resin build-up; a clogged platen reduces flatness and can cause belt glazing. Common pitfalls include over-pressuring the belt, which can cause gouges; under-pressuring, which leads to inefficient removal; and starting sanding before the belt reaches the optimal operating temperature, which reduces cutting efficiency. Regular maintenance should include dust collection checks, belt tracking adjustment, and periodic inspection of drive wheels and bearings. Store belts in a dry, dust-free environment to extend belt life. Finally, always use belts that match the linisher’s model and approved belts to maintain performance and safety.
Cost, value, and long-term considerations
Price is one factor; long-term value depends on how frequently you use the tool and the availability of belts and accessories. A linisher can deliver significant time savings on large flat projects, but it requires space, a solid work surface, and reliable dust extraction. Consider the learning curve and whether you will be comfortable with belt changes, tracking, and managing heat. In a typical home shop, the upfront cost of a linisher may be justified if you routinely perform bulk stock removal on panels or floors; for occasional hobby work, you may prefer a lighter, more versatile sander and perform bulk removal with alternate methods. SanderSavvy analysis shows that the decision should be guided by your typical projects, workflow, and safety practices; if you commonly work on large flat boards or floors, the linisher often represents a strong value proposition, especially when paired with quality dust extraction and belt management. When budgets are tight, choose belts with wide availability and predictable wear characteristics; if you need precise finishing, reserve orbital or palm sanders for the final steps.
Practical starter project plan: linisher-based panel flattening to finish
This starter plan outlines a practical approach using a linisher for a small panel or table top. Start by selecting a hardwood panel with a known finish to practice on. Attach the panel to a stable work surface and set up your dust extraction. Begin with 40–60 grit belt to flatten and remove finish, then advance to 80–120 grit to level and smooth. Switch to 180–240 grit for final pass to prepare for finish. Move the sander with light, even pressure and a straight-line motion across the grain where possible. After completing the belt passes, check for flatness with a straightedge; fill any remaining indentations with a wood filler if needed and re-sand. Finally, wipe down the surface, apply the finish, and cure. This plan gives you hands-on practice with a linisher while highlighting the key differences between linisher and orbito-sanding strategies. Adjust the plan for your project size and wood species, and remember to maintain good dust control throughout the process.
Comparison
| Feature | linisher (belt sander) | random orbital sander |
|---|---|---|
| Material removal speed on flat surfaces | high (linisher) | moderate-to-high (orbital) |
| Finish quality | possible swirl marks if not controlled | finest, swirl-free finish with proper technique |
| Belt/disc availability | wide belt options; varied backing | disc pads with consistent wear |
| Best for | bulk stock removal on flat panels and edges | finishing edges, curves, and detailed surfaces |
| Dust control | effective with a good dust port and extractor | works well with most vacuum systems |
What's Good
- Fast material removal on large flat surfaces
- Versatile belt options for rough to finish work
- Can reduce work time on flattening tasks
- Good dust control when paired with a system
Weaknesses
- Finish can show swirl marks without proper technique
- Heavier and less maneuverable than some orbital sanders
- Belt changes and tracking require setup
- Higher learning curve for optimal results
Linisher suits bulk removal on flat surfaces; orbital sanders excel in finishing and curves.
For large flat panels, the linisher offers speed and efficiency. For finishing touches and tricky shapes, a random orbital sander or palm sander often yields a finer, cleaner surface. Choose based on surface geometry, desired final look, and dust-management capability.
Your Questions Answered
What is a linisher?
A linisher is a belt-driven sander with a wide belt and often a rigid platen. It’s designed for rapid material removal on flat surfaces and for flattening tasks. The belt runs continuously and is changed similarly to other belt sanders.
A linisher is a belt sander with a wide belt for fast flat-surface work. It’s great for leveling large areas and stock removal, especially on flat panels.
Is linisher the same as a belt sander?
Yes. A linisher is essentially a belt sander focused on optimizing bulk removal on flat surfaces. The main differences come from belt size, platen rigidity, and how you apply pressure.
Yes—a linisher is basically a belt sander designed for fast flat-surface sanding.
When should I use a linisher over an orbital sander?
Use a linisher for rapid bulk removal and flattening of large flat panels. Choose an orbital sander for finishing, fine smoothing, and curved or contoured shapes where swirl-free results are important.
Use a linisher for bulk leveling; switch to an orbital sander for finishing and curves.
Can a linisher be used for finishing woodworking?
It can provide the initial smoothing, but to achieve a premium finish you typically follow with a finer grit on a finishing sander. Linishers excel in reducing bulk quickly.
It’s good for roughing out; finishing is better with a finer sander.
What grit should I start with on a linisher?
Begin with a coarse belt (around 40–60 grit) for heavy removal, then progress to mid-grits (80–120) and finish with fine grits (180–240) to prep for finishing.
Start rough with 40–60 grit, then move to 80–120, and finish with 180–240.
How do I prevent belt tracking issues?
Ensure proper belt installation, correct belt direction, and consistent tension. Regularly check the tracking adjustment and clean the pulleys. A worn belt or misaligned platen is a common cause of drift.
Install belts correctly, keep tension steady, and check tracking often.
Main Points
- Evaluate surface geometry before selecting a sander
- Progress grits from coarse to fine for best results
- Prioritize dust control to protect health
- Practice on scrap wood to refine technique
- Match tool choice to project scope and finish needs