Belt Sander vs Planer: A Practical Guide for Woodworking Projects
Explore the belt sander vs planer comparison. Learn when to use each tool, how they differ, and practical tips for safe, efficient woodworking on floors, decks, and walls.

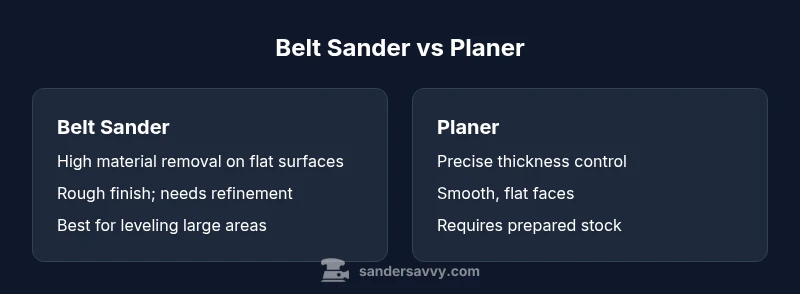
Comparing a belt sander and a planer shows that they serve different purposes in woodworking. The belt sander excels at rapid flattening and stock removal on large, rough surfaces, while a planer produces precise thickness and smooth faces on stock with parallel sides. For many flooring and furniture projects, you’ll want to plan which task each tool will handle first.
What is the belt sander vs planer: core roles in woodworking
In any woodworking project, a belt sander and a planer play distinct but complementary roles. The belt sander vs planer question is commonly asked by homeowners and DIY enthusiasts who want to choose the right tool for the job. According to SanderSavvy, understanding the fundamental purpose of each device helps avoid wasted effort and suboptimal results. A belt sander is designed to remove material quickly from flat surfaces, evening out high spots and leveling boards with rough grit engagement. It shines on large, open areas like floors or tabletops where speed matters more than a perfect surface right away. A power planer, by contrast, shaves thin layers from boards with precision, producing parallel faces and a controlled thickness. Planers excel when you need consistency across multiple pieces, especially for furniture components, cabinet faces, or when preparing stock for glue‑ups. The belt sander can introduce swirl marks or gouges if misused, while a planer can leave tool marks if the blade setup is not properly adjusted. Both tools require careful setup, sharp blades or belts, and a clear plan for the project sequence. The key is to map out which task belongs to rough shaping and which belongs to finishing, then execute with steady technique.
How a belt sander works: mechanics, belts, tracking, dust collection
A belt sander uses a motor to drive a continuous loop of abrasive belt. The belt rides over rollers and is tensioned so it tracks along a defined path. The abrasive surface removes material as the workpiece is fed across the belt. Key aspects include belt grade and grit, motor horsepower, and an accessible dust port or bag. Tracking adjustments keep the belt centered and prevent lateral wandering. Operators should check for belt wear, ensure the dust port is connected to a capable extraction system, and use proper stance to avoid tipping or kickback. Proper technique minimizes gouging and swirl marks. For home workshops, choosing a belt with a durable belt material, consistent tracking, and easy belt change is valuable. Maintenance involves inspecting the belt for glazing, replacing when necessary, and validating that the tracking mechanism functions smoothly. In practice, the belt sander is best for aggressive stock removal on large flat surfaces and for leveling irregular boards without needing to flatten edge-to-edge parallelism.
How a planer works: blades, feed, depth, surfaces
A power planer shaves small slices from the face of a board using rotating blades mounted on a cutterhead. The depth of cut is adjustable, and the board is fed across the blades by the machine’s feed mechanism. Planers excel at producing parallel faces and a consistent thickness, which is essential for joinery and precise fits. Proper setup includes blade sharpness, correct depth adjustments, and ensuring stock has at least one flat face. The planer relies on stable feeds and adequate support to avoid snipe or uneven removal, especially with longer stock. Unlike a belt sander, planers are less forgiving of bowed boards unless previously dressed or jointed. In real-world work, you often start with rough stock to reduce it to a uniform thickness, then use other tools for final smoothing. For most DIY projects, the planer serves as the thicknessing workhorse, delivering repeatable results when the stock is prepared correctly.
Key differences at a glance: speed, finish, stock needs
- Speed and aggressiveness: belt sanders remove material quickly but can be harder to control for a precise finish; planers are slower but deliver consistent thickness and faces.
- Finish quality: planers yield smooth, uniform surfaces; belt sanders require careful grit selection and multiple passes to approach the final surface quality.
- Stock preparation: belts work well on rough stock and do not require perfect flatness; planers demand at least one flat face and parallel opposite faces.
- Edge handling: planers excel at creating parallel faces up to the edges; belts can level large fields but edges may require secondary shaping.
- Dust and waste: both require dust collection, but belt sanding creates a broader dust plume; planing generates shavings and dust that respond differently to collectors.
- Best for: belt sander for leveling and rapid removal on large surfaces; planer for thicknessing and joinery-ready stock.
Use-case scenarios for belts: leveling floors, removing finishes, curved surfaces
In projects involving rough stock or uneven surfaces, a belt sander is often the fastest option for removing material and smoothing a wide area. It’s particularly effective when flattening floor boards, removing old finishes, or dialing in a level surface across a tabletop. Belt sanders perform well on straight edges and broad faces, but you must work gradually to avoid gouges. For curved or irregular surfaces, choose lighter passes and keep the piece moving to maintain an even plane. Always keep the sander flat on the surface and use successive grits to refine the finish. A belt sander is almost always part of the initial surface preparation stage, followed by refinement steps with more controlled tools.
Use-case scenarios for planers: thicknessing stock, squaring boards, planing one face for glue-ups
Planers are preferred when you need a precise thickness and consistent face squareness across multiple boards. They shine in thicknessing operations, ensuring components that must fit together have the same dimension. Planing is essential before edge joining to achieve uniform edge quality and straight edges for glue‑ups. For stock with bowed faces, you may need to joint or flatten a face first, then run the opposite face to achieve a uniform thickness. Planers also help when building cabinetry, furniture parts, or doors where precise dimensions drive fit and finish. The key with planers is to manage stock with care: feed it evenly, avoid sudden stops, and verify depth settings before taking a full pass. When used correctly, a planer dramatically improves workflow efficiency by delivering repeatable results that you can rely on for the rest of the project.
Practical workflow: planning your project around tool selection
A practical approach is to outline the project’s major steps and assign tools to each stage. Start with rough flattening and material removal using the belt sander to bring boards to a common plane. Move on to thicknessing and face surfacing with the planer, ensuring all pieces meet the required thickness and parallelism. After thicknessing, you may return to the belt sander for light surface refinement or to remove marks left by the planer. Build a small stock library of reference boards and scrap pieces to test grit and pass direction before touching the final material. Maintain consistent safety practices, use reputable dust collection, and wear protection throughout. By mapping the sequence—rough shaping, thicknessing, then finishing—you reduce waste and improve consistency.
Safety, dust, and workspace setup
Woodworking with belt sanders and planers requires attention to dust and personal protection. Always wear eye protection, hearing protection, and a dust mask or respirator when warranted. Set up a dedicated dust extraction system with appropriate ducting for your tools and a clean workspace to minimize tripping hazards. Keep sleeves and jewelry secured to prevent entanglement, and maintain a stable stance to control kickback or kick-off. Spot-check belts and blades regularly for wear or glazing and replace as needed. Store blades and belts in a dry, clean area to prevent corrosion. The right safety mindset plus a capable dust collection strategy makes both tools safer and more effective, especially during long sessions.
Maintenance, common issues, and troubleshooting
Regular maintenance extends tool life and improves results. Inspect belt tracking and adjust as needed to prevent wandering. Sharpen or replace blades for planers and ensure a clean blade setup for consistent cuts. Lubricate moving parts if the manufacturer recommends it and replace any worn components promptly. Common issues include belt glazing on sanders, snipe on planing passes, and uneven stock due to misalignment or dull blades. Troubleshooting begins with checking the stock preparation, then verifying depth and feed rate, and finally inspecting the tool’s consumables. Addressing these elements often resolves most performance problems. With a proactive maintenance plan, you’ll reduce downtime and experience more reliable outcomes.
Cost considerations and buying guidance
When evaluating belt sanders vs planers, consider the overall value a single tool adds to your shop, as well as the cost of consumables like belts and blades. Belt sanders typically offer aggressive material removal at a lower upfront cost, while planers provide precise, repeatable results that can justify a higher upfront investment for project-critical tasks. Think about your typical projects, available storage space, and how often you’ll switch between tools. If budgets are tight, you may opt for a versatile, well‑balanced belt sander with a robust dust port and plan to acquire a good thicknesser later. If you frequently build furniture or cabinetry, the planer’s ability to deliver consistent thickness and parallel faces can be worth the cost. In all cases, look for features such as smooth belt tracking, comfortable handles, reliable dust extraction, and ease of blade or belt changes to maximize value over time.
Comparison
| Feature | belt sander | planer |
|---|---|---|
| Best for | Belt sander: leveling rough surfaces and rapid material removal on large flat areas | Planer: thicknessing and producing parallel faces for joinery |
| Finish quality | Belt sander: finish depends on grit and technique; often rougher until refined | Planer: smooth, uniform faces when stock is properly prepared |
| Stock requirements | Belt sander: tolerates rough stock and non-flat surfaces | Planer: requires stock with a flat face and parallel opposite faces |
| Edge handling | Belt sander: edges can be challenging; better on wide faces with support | Planer: edges treated with care; requires appropriate stock prep for clean edges |
| Dust management | Belt sander: creates broad dust plume; best with strong extraction | Planer: produces shavings and dust; extraction improves cleanliness and blade life |
| Throughput and control | Belt sander: aggressive removal with careful technique and multiple passes | Planer: controlled, repeatable cuts with depth control |
| Best for | Belt sander: flattening floors and leveling large surfaces quickly | Planer: precise thicknessing and joinery-ready stock |
What's Good
- High material removal speed on large flat surfaces
- Consistent thickness and smooth faces with a planer
- Together they cover a complete workflow from rough stock to finished pieces
- With proper dust collection and PPE, dust exposure is manageable
Weaknesses
- Belt sanders can gouge or leave low spots if not controlled
- Planers require stock to be flat and parallel; misalignment causes chatter
- Switching tools adds setup time and tool changes
- Both produce dust; efficient dust collection is required
For most DIY projects, use the belt sander for rough leveling and the planer for final thicknessing.
The belt sander accelerates material removal on wide surfaces, while the planer delivers consistent thickness and square faces. A sensible workflow blends both tools to maximize efficiency and finish quality.
Your Questions Answered
When should I choose a belt sander over a planer?
Choose a belt sander when you need fast material removal and flattening of rough surfaces or large floor areas. It’s less suited for precise thickness or edge quality.
For rough leveling or quick material removal, use the belt sander first, then switch to finer tools for finishing.
Can I substitute a belt sander for a planer if I have limited tools?
Not exactly; a belt sander cannot reliably produce thickness or parallel faces. You can rough-level stock, then finish with other methods.
A belt sander isn’t a true substitute for thicknessing; plan for a dedicated planer if you need precise dimensions.
What stock preparation is best before planing?
Ensure stock has at least one flat face; planers cut parallel faces and will produce a uniform thickness. Bowed stock may require flattening with a jointer or belt sander.
Make at least one face flat before planing for best results.
What safety steps reduce dust when using belt sanders and planers?
Always wear eye and hearing protection; use a dust collection system; seal off the workshop; avoid loose clothing. Proper PPE and extraction are essential.
Protect your lungs with a good dust system and PPE.
How to switch between belt sander and planer efficiently?
Plan your workflow ahead, keep blades sharp, and set depth accurately. Allow the machine to come to full stop before changing belts or blades.
Plan ahead and reset settings carefully when switching tools.
What finishes can I expect after planing and sanding?
Planing produces a clean, flat surface ready for joinery or finishing; sanding refines rough edges and removes tool marks. Additional steps like sealing or staining may follow.
Expect a flat, smooth base after planing, then refine with sanding.
Main Points
- Assess surface condition before choosing tooling.
- Use belt sander for leveling and rough removal on large surfaces.
- Use planer for precise thicknessing and joint-ready faces.
- Prioritize dust collection and PPE for safety.
- Test grit and settings on scrap stock before final passes.