Orbit vs Belt Sander: A Practical Comparison
A thorough, practical comparison of orbit (random orbital) and belt sanders to help homeowners select the right tool for finish, stock removal, and project needs.

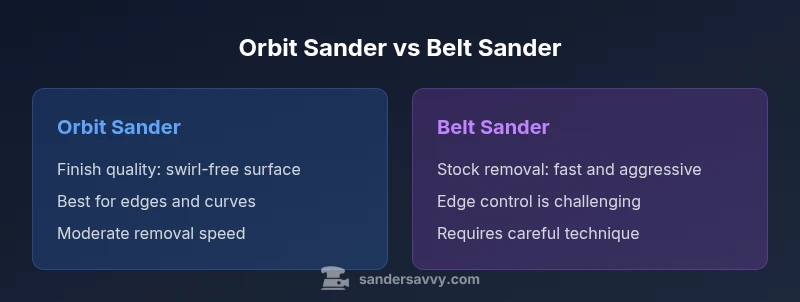
Orbit sanders and belt sanders serve different roles in wood finishing. An orbit sander delivers a finer, swirl-free finish with less gouging, ideal for long, flat surfaces and delicate edges. A belt sander removes material quickly for rough shaping and heavy stock removal, though it requires more control to avoid gouges. Your choice hinges on project scope, desired finish, and patience.
What are orbit and belt sanders?
Orbit sanders (often called random orbit sanders or ROS) use a circular sanding pad that spins while executing a small, irregular orbit. This dual motion minimizes visible scratching and yields a smooth, even finish on a wide range of woods and coatings. Belt sanders use a continuous loop of abrasive belt wrapped around two drums; the belt moves at high speed to strip material rapidly, making them ideal for aggressive stock removal and rapid reshape work. The most common sizes for home workshops are around 5 inches for orbit sanders and compact belt units for portable use. In practice, you’ll find orbit sanders favored for finishing, while belt sanders shine when you need to flatten, level, or remove lots of material quickly. According to SanderSavvy, understanding these mechanics helps homeowners decide which to rent or buy and how to approach a project with the right sequence and grit plan. Dust collection, noise, and vibration levels also differ, influencing comfort during long sessions. In short, orbit sanders are your go-to for a refined surface, belt sanders for speed on rough stock, with grit progression guiding both paths.
How they differ in action and finish quality
The key difference lies in motion and contact pattern. An orbit sander’s pad moves in a random orbit, producing tiny circular scratches that the paper blends away, resulting in a smoother surface with fewer repeat passes. Belt sanders drive a belt edge-first, which aggressively removes material and can gouge if not carefully controlled. Finish quality on wood previously sealed or stained tends to be superior with orbital sanding, especially on flat panels and curved surfaces where the orbit’s slight irregularity helps avoid trenching. Belt sanders excel where rapid stock removal is required, such as leveling high spots, thinning raised panels, or removing thick finishes. Both tools benefit from dust extraction; a connected vacuum or dust bag reduces airborne particles and keeps abrasives from loading prematurely. For identical grits, orbital sanding yields a finer final texture, whereas belt sanding demands careful technique and frequent belt changes to maintain edge control and prevent heat buildup. Sander ergonomics and weight also influence outcomes; heavier belt sanders can cause fatigue on large projects unless you adopt proper stance and weight distribution.
When to choose an orbit sander
Choose an orbit sander when your primary goal is a smooth, even finish with minimal visible swirl. It’s ideal for finishing planks, doors, paneling, and furniture surfaces where a flawless topcoat will be applied. It shines on flat to gently contoured surfaces and works well around curves and edges with appropriate pad shapes. Use finer grits (120–220) to refine prior sanding or remove small imperfections from previously finished surfaces. For stain preparation, orbital sanding is typically sufficient and minimizes risk to edges and corners. If your project includes multiple coats of polyurethane or varnish, finishing passes with an orbital sander help ensure the coating adheres uniformly and reduces sanding marks. Light to moderate stock removal tasks can be managed with a 60–120 grit sequence, followed by finer polishing grits to achieve a glassy surface. Proper technique—keeping the sander moving, applying even pressure, and rotating your approach through the surface—will maximize results. In short, orbit sanders balance speed, control, and surface quality for most finishing tasks in home woodworking.
When to choose a belt sander
A belt sander is the tool of choice when you need to remove material quickly or flatten uneven surfaces. It’s particularly effective on large, flat surfaces like tabletops, door panels, or floor patches where you can control the belt’s aggressive bite. Belt sanders excel at stock removal, leveling high spots, and removing old finishes in a fraction of the time compared to orbital tools. When using a belt sander, start with coarser grits (40–60) to establish a true plane, then move through finer grits (80–120) to prepare for finish. Edge work with a belt sander requires extra care, as the belt’s straight edge can bite into corners if misapplied. Belts wear unevenly and can burn wood if overheated, so frequent checks and belt changes are essential. For projects involving heavy material removal, such as renovating a worn floor or clearing old varnish from a wide surface, belt sanding offers significant time savings. The key is to maintain control and avoid long, continuous passes in one spot to minimize gouging.
Practical setup: dust collection, grit progression, and technique
Effective dust control improves visibility, reduces airborne particles, and extends the life of your abrasives. Connect a shop vacuum with a suitable nozzle to your sander’s dust port, and use a dust-collection bag or canister if available. For orbit sanders, start with a medium grit (80–120) for general smoothing, then progress to finer grits (150–220) for finishing passes. Belt sanders benefit from a similar progression, but you’ll likely begin with coarser belts (40–60) for rapid stock removal, advancing to 80–120 and finally 150–180 for smoothing. Always keep the sander flat to the surface and avoid pressing down hard; let the weight of the tool do the work. To prevent clogging, periodically clean the paper or replace belts when you notice reduced cutting efficiency or excessive heat. Safety goggles, a dust mask or respirator, and hearing protection are recommended for all sanding tasks. A common best practice is to wipe the surface with a tack cloth between grit changes to remove fine dust and reveal the true surface condition before proceeding.
Edge and corner work considerations
Smoothing edges and corners presents unique challenges. Orbit sanders can be used with square or half-sheet pads to approach edges, but you must avoid creating dips or rounding the edge unintentionally. Belt sanders naturally handle flat areas well but are less maneuverable in tight corners; use a smaller belt sander or a finishing sander to approach edges from multiple angles. When working near joints or moldings, switch to a finer grit on the orbit sander to blend the edge with the face, minimizing visible transitions. For tight radiuses, consider a palm sander with a narrow pad or a detail sander as a supplement. The goal is to achieve a uniform surface texture while preserving edge detail and preventing flat spots or gouges that can show through a finish.
Comparison
| Feature | Orbit sander | Belt sander |
|---|---|---|
| Power & speed (torque/acceleration) | Moderate torque with smooth finishing | High torque with aggressive stock removal |
| Finish quality | Excellent for fine finishes with swirl-free results | Good for rapid removal but higher risk of gouges |
| Sandpaper/belt type | Discs on a round pad (random orbit) | Belt around two drums (continuous belt) |
| Best for | Flat/curved surfaces requiring delicate smoothing | Heavy stock removal on large, flat areas |
| Ease of use | Easier to control, better maneuverability on edges | Faster on large surfaces but heavier and harder to control near edges |
| Dust collection | Dust port on most models; performance varies by pad size | Usually strong dust collection when paired with a vacuum system |
| Cost range (new) | $50–$180 | $60–$200 |
What's Good
- Clear differentiation helps users pick the right tool for the job
- Orbit sander delivers consistent, high-quality finishes
- Belt sander removes material quickly, saving time on rough tasks
- Both offer a range of grit and pad options for versatility
Weaknesses
- Orbit sander is slower for heavy stock removal
- Belt sander can gouge edges if misused or rushed
- Dust management varies by model and attachment
- Transitioning between tools adds complexity to a project
For finishing work, choose an orbit sander; for rapid removal, opt for a belt sander.
Orbit sanders excel in producing smooth, even surfaces with minimal gouging, whereas belt sanders speed up material removal on large flat areas. In mixed projects, plan a two-step workflow and clean up with appropriate grit progression.
Your Questions Answered
What is the main difference between an orbit sander and a belt sander?
The main difference lies in motion and finish. An orbit sander uses a rotating pad with a random orbit to produce a fine, swirl-free finish, while a belt sander runs an abrasive belt for rapid material removal. Finish quality and control differ accordingly.
Orbit sanders give a smoother finish with less gouging, while belt sanders remove material fast but require careful handling to avoid gouges.
Can I use an orbital sander for heavy stock removal?
Orbital sanders are not ideal for aggressive stock removal. Use a belt sander or start with a belt sander if you need to flatten or remove thick coatings quickly, then switch to an orbital sander for finishing.
For heavy removal, a belt sander is better; finish with an orbital sander to even out the surface.
Are belt sanders good for finishing surfaces?
Belt sanders can finish surfaces, but they are more prone to leaving marks if not used carefully. They’re best for initial flattening and then followed by finer orbital sanding for a smooth final finish.
They can finish, but orbit sanders usually give a nicer finish with less risk of gouges.
Which sander is safer for edges and corners?
Orbit sanders offer better control around edges due to their maneuverability, while belt sanders require careful technique near edges to avoid gouges. For tricky corners, pair with a detail sander for blending.
Orbit sanders are easier to maneuver near edges; belts need care near corners.
Can I switch sanding grits easily between tools?
Yes. When transitioning between grits, inspect the paper or belt for loading and replace as needed. Always follow grit progression from coarse to fine to avoid cross-contamination of finishes.
Yes, just change the abrasive and follow cool-down steps between grits.
What maintenance do they require?
Keep dust ports clear, replace worn belts or discs promptly, and periodically inspect the screws and guard plates. Regular cleaning and proper storage extend tool life and maintain performance.
Clean the dust ports, check belts, and store tools properly.
Main Points
- Assess project scope before selecting a sander
- Use orbit sanders for finish work and belts for stock removal
- Maintain dust collection and proper grit progression
- Protect edges and corners with careful technique
- Test on scrap wood before committing to the final surface