Orbital Sander vs Finish Sander: A Practical Guide
Compare orbital sander vs finish sander to select the right tool for speed, finish quality, and control. This in-depth guide explains key differences, best uses, and practical buying tips for DIY homeowners.

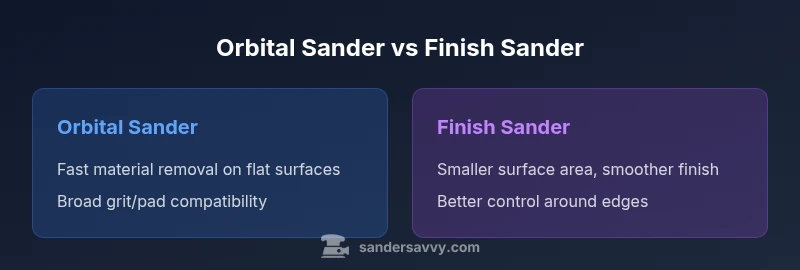
Orbital sander vs finish sander helps you balance speed with finish quality. For large, flat surfaces, an orbital sander accelerates work; for final smoothing and tight corners, a finish sander shines. In most DIY projects, start roughing with an orbital sander and switch to a palm/finish sander for the final pass.
Introduction and framing
When you tackle wood surfaces, the choice between orbital sander vs finish sander shapes your speed, finish quality, and overall project satisfaction. Understanding the core differences helps homeowners and DIYers pick the right tool for the job. According to SanderSavvy, choosing the right sander begins with matching surface area, desired finish, and dust control to the task at hand. The SanderSavvy team found that most beginners underestimate how much finish quality hinges on using the correct pad and grit, not just tool power. This guide breaks down how each tool works, where they excel, and where compromises show up, so you can make an informed decision before you buy.
Across projects—from floors to furniture—grit progression and technique matter almost as much as tool choice. By the end, you’ll know whether orbital sander vs finish sander is the hinge that determines your project’s success. Remember, the goal is a smooth, even surface with minimal sanding time and dust exposure. This article uses practical examples, safety tips, and a clear buying path to help you pick the right tool for your specific task.
-1
Comparison
| Feature | Orbital Sander | Finish Palm Sander |
|---|---|---|
| Best for | Large flat surfaces and rapid material removal | Finishing work on panels, trim, and edges |
| Finish quality | Can leave swirl marks if not kept flat or using coarse grits | Typically delivers a smoother, more controlled finish |
| Vibration and control | Higher vibration; quick progress on flat surfaces | Lower vibration; greater control for corners and detail |
| Disc/Pad compatibility | Disc pads (3-5 inch) with varied grits | Rectangular or square pads (often 5 inch) with foam or paper sanding sheets |
| Dust collection | Strong with proper dust bag or vacuum attachment | Varies by model; works well with decent dust collection if paired with vacuum |
| Price range | $40-$150 for consumer to mid-range models | $30-$120 for standard palm/finish sanders |
| Best for | Floors, decks, and large surfaces where speed matters | Furniture, cabinetry, and tight corners where finish quality matters |
What's Good
- Speeds up rough work on large surfaces with an orbital sander
- Offers broad compatibility with many grits and pad options
- Finish sanding with a palm sander provides smoother final surfaces
- Both tools are commonly affordable for DIYers and homeowners
Weaknesses
- Orbital sander can produce swirl marks if used aggressively on final passes
- Finish palm sander is slower on large areas and may require more passes
- Dust collection depends on model quality and setup; poor dust control increases cleanup
Use a two-tool approach: rough with an orbital sander and finish with a palm sander for the best balance of speed and surface quality
For most DIY projects, start with an orbital sander for rapid material removal on large areas, then switch to a finish sander to achieve a smooth final surface. This combo minimizes time while maximizing finish quality.
Your Questions Answered
What is the practical difference between an orbital sander and a palm/finish sander?
An orbital sander typically uses a round pad that moves in a small circular orbit, suitable for fast material removal on flat surfaces. A palm or finish sander uses a rectangular or smaller pad and is designed for smoother finishes and better control in tight areas. In practice, many products labeled as orbital are actually random-orbit sanders, combining orbital motion with rotation for less gouging.
Orbital sanders move in small circles to remove material quickly, while palm sanders focus on finishing smoother surfaces with better edge control.
Can I finish with an orbital sander?
Yes, but it requires careful technique: use finer grits, keep the pad flat, and avoid lingering in one spot to minimize swirl marks. For final finishes, many DIYers switch to a palm sander or a finishing pad to achieve the smoothest result.
Yes—just use fine grits and steady, light passes to reduce swirl marks.
Which sander is best for wood floors?
For most wood-floor projects, a random-orbit (often marketed as an orbital sander) is preferred for bulk leveling and speed, followed by a finishing pass with a palm sander or detail sander along edges and corners. A belt sander is used for heavy leveling but requires more skill.
A random-orbit/similar orbital sander is usually the go-to for floors, with a finish sander for edges.
How can I avoid swirl marks when using an orbital sander?
Keep the sander flat on the surface, use a progression of grits from coarse to fine, avoid staying in one spot, and frequently check for unevenness. Use a random-orbit model if possible to help disguise minor imperfections.
Keep it moving, use the right grit sequence, and don’t dwell in one spot to prevent swirls.
What safety and dust-control practices matter with these tools?
Always wear a mask and eye protection. Use a dust collection system or shop vac, empty the bag regularly, and ensure good ventilation. Keep cords out of the work area to prevent snagging and maintain tool balance.
Wear a mask, use a good dust collector, and keep your workspace well-ventilated.
Main Points
- Match tool choice to surface area and finish goals
- Use orbital sander for bulk removal on large, flat areas
- Switch to finish sander for final smoothing and edges
- Invest in a good dust collection setup
- Practice grit progression and technique on scrap wood