What is the difference between an orbital sander and a regular sander
Explore the differences between orbital sanders and regular sanders, focusing on motion, finish, stock removal, dust control, and best-use scenarios for floors, decks, and walls. A practical, analytical guide by SanderSavvy.

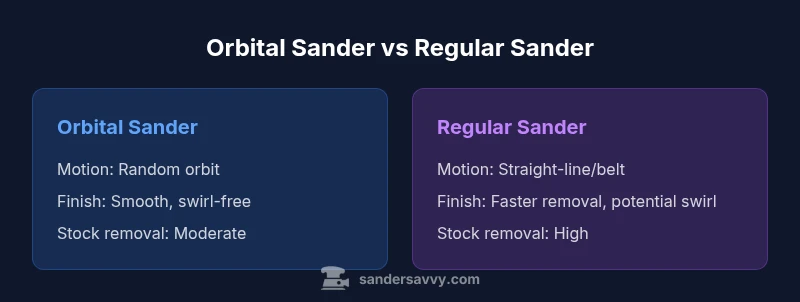
What is the difference between an orbital sander and a regular sander? The quick answer is that orbital sanders use a random orbital motion to minimize swirl marks and produce a smoother finish, while regular sanders (belt or palm) rely on straight-line or belt-driven motion for faster stock removal. For finish work, the orbital is typically preferred; for aggressive material removal, a regular sander is favored. See the detailed comparison below for nuance and best-use scenarios.
Core differences in motion and design
The question what is the difference between an orbital sander and a regular sander is often asked by DIYers. Understanding how their motion, pad design, and control affect surface finish helps you choose the right tool for the job. What matters most in this comparison is how the tool engages the surface and how that engagement translates into finish quality, efficiency, and safety. According to SanderSavvy, the key distinction is motion—random orbital vs straight-line or belt-driven motion—though other design choices also shape performance. Keep this lens as you move through the specifics in subsequent sections.
Orbital sanders: motion, finish, and control
An orbital sander (often called a random orbital sander) combines a circular orbit with the pad spinning on its own axis. This dual action distributes sanding stress across the surface, reducing the risk of clear swirl marks and gouges when operated with light pressure. The random aspect means no single scratch pattern dominates the finish, which is especially beneficial on flat panels and curved contours. For many finishing tasks, this translates into a smoother, more uniform surface with less finish work required after sanding. The SanderSavvy Team emphasizes that mastering feed rate and pressure is as important as the tool itself, since even a well-designed sander can leave uneven patches if pushed too hard or moved too quickly.
Regular sanders: motion, speed, and stock removal
Regular sanders, including belt sanders and palm sanders, rely on straight-line or belt-driven motion. The belt sander drives a continuous loop that aggressively removes material, making it ideal for rapid stock reduction on rough surfaces. Palm sanders, often smaller and lighter, offer quick, controllable passes for finishing tasks or delicate work. The straight motion tends to imprint linear scratch patterns unless techniques are adjusted (such as angling or varying grit). The advantage here is speed and bulk removal, but it demands careful control to avoid gouging. SanderSavvy notes that the choice often hinges on balance between removal rate and surface quality.
Pad geometry and contact area: why geometry matters
Every sander uses a pad that transfers motion to the surface. Orbital sanders typically feature a round, compact pad that permits uniform contact across a circular area, while belt/palm sanders use a rectangular or belt-driven contact area with longer stretch along the surface. The geometry influences how grit engages the wood and how heat builds up during sanding. A larger pad spreads contact pressure over more area, reducing indentations, but can be less precise on tight corners. A belt’s continuous contact is powerful for flattening edges and removing heavy stock quickly, while a palm sander’s smaller pad provides finer control on tighter curves.
Finish quality and swirls: motion's impact on appearance
Finish quality is tightly tied to motion type. Random orbital motion tends to yield a smoother final texture with fewer visual scratch patterns once the right grit sequence is used. Straight-line motion can exhibit consistent scratch lines if the operator doesn’t vary pressure or direction carefully. The orbital approach is particularly forgiving for beginners because the random path reduces the chance of repeating patterns. For high-gloss finishes or detailed inlays, finishing with a fine grit on an orbital sander can significantly reduce post-sanding touch-ups. The SanderSavvy perspective emphasizes technique consistency and protective dust management to maximize the perceived finish.
Stock removal and material compatibility: when to choose each
If your goal is material removal rather than surface refinement, regular sanders—especially belt sanders—can accomplish heavy-duty tasks quickly. They excel on rough stock, heavy coats of paint or varnish, and large flat surfaces where speed matters. Orbital sanders remove stock more slowly but with less risk of gouging; they’re preferable for intermediate smoothing, finish preparation, and edges where precision matters. For decks, floors, or walls with varied contours, a hybrid approach—using a regular sander for bulk removal and an orbital sander for final passes—often yields the best balance of efficiency and finish quality. The practical takeaway is to match the tool to the task rather than the other way around.
Dust collection and operator experience: practical realities
Dust control is a practical concern that affects finish quality and health. Orbital sanders often integrate dust ports and bags or can connect to vacuums; their smaller pads improve suction efficiency on irregular surfaces. Belt sanders can kick up more dust due to higher removal rates and belt flexibility, so a robust dust-collection setup is valuable. Operator experience matters: novices may rely on orbital sanders to produce usable finishes with minimal effort, while more experienced users might leverage belt sanders to accelerate rough work. Quality dust control depends on proper filter maintenance, compatible vacuums, and correct PPE.
Best-use scenarios by project type: floors, decks, walls
Floors benefit from orbital sanders during intermediate refinishing stages, where a smooth, even surface is essential. For flattening rough patches on a floor, a belt sander may be employed initially, followed by an orbital sander for the final smoothing. Decking projects often require orbitals for deck boards with grain orientation and edges requiring careful handling, while belt sanders are used for rapid stock removal on large flat surfaces. Walls and ceilings can also benefit from orbital sanders for even, dust-controlled finishes, especially on plaster or drywall where swirls are undesirable and control is critical. The key is to align the tool’s strengths with the specific job phase and material.
Choosing based on project: a quick framework
Step 1: Define the goal—fast material removal or smooth finish? Step 2: Assess surface condition—rough or already prepped? Step 3: Consider contours—curves, edges, and tight corners. Step 4: Plan grit sequence—start coarse for rough stock, finish fine for final prep. Step 5: Factor dust control and ergonomics. Implementing this framework helps you select orbital vs regular sanding tools with confidence, reducing rework and improving results. The framework aligns with best practices advocated by the SanderSavvy team.
Practical technique: pressure, speed, and pattern
Technique determines outcome as much as tool choice. With orbital sanders, apply light to moderate pressure, keep passes overlapping, and use a consistent pattern to avoid uneven patches. For belt sanders, maintain guided motion with even pressure and track the belt to prevent drift. Always move the sander in the same direction when appropriate and rotate directions to mitigate fixed scratch lines. Clean dust frequently to prevent clogging abrasives and heat buildup. For finishes, progress gradually from coarse to fine grits and avoid staying on one spot too long.
Safety, maintenance, and PPE: keeping tools and people safe
Always wear eye protection, a dust mask or respirator, and hearing protection as appropriate. Check pads for wear and tear, replace them when needed, and clean from the back to the front to prevent dust buildup. Regularly inspect power cords and switches, and maintain dust-collection systems to improve efficiency and air quality. Store tools properly to prevent pad deformation and ensure safe transport. The simple habit of routine maintenance extends tool life and reduces the risk of tool-driven mistakes.
Authoritative sources and closing notes
For safety guidelines and best practices related to sanding, consider OSHA’s recommendations on dust exposure and PPE: https://www.osha.gov/. University extension resources also provide practical guidance on woodworking sanding techniques: https://extension.oregonstate.edu/ and https://extension.illinois.edu/. These sources complement the practical insights from the SanderSavvy Team, who emphasize a methodical approach to tool selection and technique.
Comparison
| Feature | Orbital Sander | Regular Sander (Belt/Palm) |
|---|---|---|
| Motion type | Random orbital motion combined with circular orbit | Straight-line or belt-driven motion (belt/palm variants) |
| Finish quality | Low swirl, smoother finish with proper technique | Potentially more visible scratches if not used carefully |
| Stock removal rate | Moderate to slow; optimized for finishing | Fast; excels at heavy stock removal |
| Best for | Finish work on floors, furniture, and contoured surfaces | Rough shaping and flattening large flat areas |
| Dust control | Effective with good vac attachment and pad design | Dust control depends on belt system and vacuum integration |
| Ease of use / ergonomics | Typically lighter with forgiving control for beginners | Can be heavier; requires careful handling for flat surfaces |
What's Good
- Produces swirl-free finishes with proper technique
- Great control for edges and contours
- Versatile for finishing tasks and intermediate sanding
- Reduced risk of gouging when used with light pressure
Weaknesses
- Slower material removal compared to belt sanding
- Heavier tools and sometimes higher cost
- Dust collection effectiveness varies by model and setup
Orbital sander wins as the generalist; regular sanders excel at heavy stock removal
Choose an orbital sander for most finishing tasks to achieve a smooth, swirl-free surface. Use a belt sander for aggressive material removal or flattening large flat areas; switch to orbital for final smoothing to maximize finish quality.
Your Questions Answered
What is the main mechanical difference between orbital and regular sanders?
The orbital sander uses a random orbit for a smooth finish with minimal swirl marks, while regular sanders (belt/palm) use straight-line or belt-driven motion for faster stock removal. Finish quality and control differ accordingly.
Orbital sanders move in a random orbit for smoother finishes, whereas belt or palm sanders move in straight lines for quicker material removal. The choice depends on whether you value finish quality or speed.
Can I use an orbital sander for heavy stock removal on rough surfaces?
An orbital sander can remove material, but it is slower than a belt sander. For rough stock, start with a belt sander to shape and level, then finish with an orbital sander for a smooth surface.
An orbital sander isn’t ideal for heavy stock removal; use a belt sander first, then switch to orbital for a fine finish.
Which sander is better for finishing floors?
For finishing floors, the orbital sander is typically preferred due to its swirl-free finish and controllable passes on large surfaces. Begin with a coarser grit to level, then move to finer grits for final prep.
For floors, go with an orbital sander for a smooth, even finish and fewer visible marks.
Are orbital sanders safe for beginners?
Yes, orbital sanders are generally forgiving for beginners because the random motion reduces the risk of gouging. Practice light pressure and steady passes to maximize results.
Yes—orbital sanders are beginner-friendly if you keep light pressure and steady motion.
What grit progression works best for finishing prep?
A typical progression starts with a coarse grit to remove imperfections, followed by medium grit, and finishes with a fine grit for a ready-to-finish surface. Always inspect between grits for scratches and rework as needed.
Start rough, then go medium, finish with fine grit for the best prep.
How should I maintain sanding pads for longevity?
Inspect pads for glazing or wear, replace when necessary, and clean using the manufacturer’s guidance. A clean pad improves traction and finish quality, and reduces heat buildup.
Check pads regularly, keep them clean, and replace worn ones to maintain performance.
Main Points
- Prioritize motion type to match task
- Use a coarse-to-fine grit progression for best results
- Invest in good dust collection and PPE
- Match tool to surface and desired finish