Handheld Belt Sander vs Orbital Sander: Side-by-Side Guide
Compare handheld belt sanders and orbital sanders to decide which tool fits your wood flooring, decking, or drywall projects. Learn usage, finish quality, dust control, and safety tips with practical guidance from SanderSavvy.

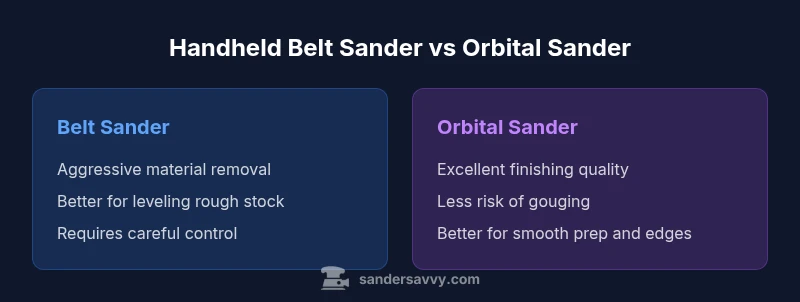
Handheld belt sanders remove material quickly but require steadier hands and plan; orbital sanders finish smoothly with less gouging and better control. For most DIY tasks, the orbital sander is ideal for prep and finishing, while the handheld belt sander handles rough stock removal and shaping. Choose based on surface roughness, project scale, and desired finish.
Core differences between handheld belt sander and orbital sander
The phrase handheld belt sander vs orbital sander describes two distinct sanding philosophies. A handheld belt sander uses a continuous loop of abrasive belt that spirals over a drum to aggressively remove material. By contrast, an orbital sander uses a sanding disc mounted on a mechanism that creates a random-orbit motion, producing a finer, more uniform finish with reduced risk of gouging. From a maintenance and ergonomics standpoint, the belt sander tends to be heavier and more demanding on the operator's grip, while the orbital sander is lighter and easier to maneuver for extended sessions. SanderSavvy analysis shows that this fundamental difference drives every practical decision—from surface preparation to finish quality and safety considerations. When choosing between the two, homeowners should assess surface roughness, project scope, and the level of finish required to determine the right balance of material removal and control.
Material removal vs finish quality
A belt sander excels at high material removal rates on rough stock, damaged surfaces, and large flat areas. Its aggressive action makes it a top choice for quickly reshaping curves or flattening a buckled floor, provided the user maintains steady pressure and keeps the belt tracking true. An orbital sander prioritizes finish quality; its circular, low-amplitude motion minimizes gouges and leaves a consistent surface ready for staining or sealing. The trade-off is slower material removal, which may lengthen the prep phase on very rough wood or previously coated surfaces. For most projects, starting with light stock removal and then switching to a finishing sander yields the best result.
Surface compatibility and material considerations
Hardwoods, softwoods, and plywood respond differently to belt versus orbital sanding. Belt sanders can chew through soft woods quickly, but they can leave tracks if mismanaged. Orbital sanders tend to be forgiving on delicate surfaces and are less likely to create noticeable swirl marks on flatter areas. When sanding floors or decks, keep the belt moving in a consistent direction to avoid creating ridges, and always test on a scrap piece if possible. SanderSavvy recommends matching grit progression to the material and desired finish to minimize rework and waste.
Project scenarios and recommendations
For quick material removal on large, flat surfaces (e.g., leveling subfloor or removing old coatings), a handheld belt sander is efficient, but reserving it for bulk work improves speed at the cost of control. For final prep, smoothing between coats, or finishing with minimal texture, an orbital sander is generally preferable. In multi-step projects, a practical approach combines both tools: begin with a belt sander to rough down high spots, then switch to an orbital sander for a uniform finish. This sequencing reduces total work time while preserving surface integrity.
Handling, ergonomics, and user safety
Belt sanders are typically heavier and can kick harder results if pushed aggressively. Maintain a relaxed grip, use push blocks on edges, and rotate surfaces to avoid creating unwanted curves. Orbital sanders are easier on the wrist due to their balanced weight and smoother motion, but users should still work with steady movements and avoid over-sanding edges. Both tools generate dust; use a proper dust collection system, wear a respirator when needed, and clean work areas to minimize airborne particulates.
Dust control, filters, and maintenance considerations
Dust collection performance varies a lot between models. A tight-fitting dust bag or effective vacuum attachment will dramatically reduce airborne particles and cleanup time. Check filters regularly and replace worn-out pads. For belt sanders, ensure the belt tracks straight and remains tensioned to prevent belt slip, which can mar surfaces. For orbital sanders, replace worn discs and inspect hooks-and-loops for secure attachment. Consistent maintenance extends tool life and maintains performance.
How to judge model features and make a choice
Look for a comfortable grip, weight balance, noise levels, vibration dampening, and reliable dust management when comparing models. A belt sander benefits from a sturdy, replaceable belt and accessible belt change mechanisms; an orbital sander benefits from a diverse range of grit options, dust extraction compatibility, and a flat, stable sanding base. Balance these features against your typical project size and budget. The right choice aligns with your task type, surface, and finishing goals.
Practical workflow: from rough to finish (example)
A typical workflow might start with a belt sander to remove high spots and level the surface, then switch to a finer grit belt or an orbital sander for smoothing. Progression from coarse to fine abrasives minimizes scratches and speeds up the overall process. Always test on a scrap area, maintain consistent pressure, and document any areas that need touch-up. This layered approach reduces rework and yields a more uniform finish, especially on floor or deck projects.
Comparison
| Feature | Handheld belt sander | Orbital sander |
|---|---|---|
| Abrasive action type | continuous loop belt for aggressive material removal | disc with random-orbit motion for finishing |
| Material removal rate | high on rough stock | lower but steadier on smooth surfaces |
| Finish quality | tracks possible with improper technique | very smooth with minimal gouging |
| Control & maneuverability | requires firm grip and steady pressure | lighter, easier to steer for beginners |
| Best surfaces | flat and very rough surfaces | smooth flat surfaces and edges |
| Dust collection | depends on model; belt sanders often need robust collection | generally strong with proper dust port |
| Ease of belt replacement / discs | belt change can be quick with a good design | disc changes are fast with hook-and-loop systems |
| Typical price range (qualitative) | budget-friendly to mid-range options | mid-range to premium options |
| Best for | heavy stock removal and shaping | finishing prep and finishing coats |
What's Good
- Helps clarify which tool suits your task and budget
- Highlights scenarios where one type outperforms the other
- Supports planning for efficient sanding workflows
- Improves safety through clearer dust management guidance
Weaknesses
- Does not replace hands-on testing of actual models
- May oversimplify variant differences between brands
- Cannot cover every niche application in a single article
Orbital sander generally excels for finishing; belt sanders win for rapid material removal
Choose the orbital sander for smooth, uniform finishes and edge work. Use the belt sander when you must remove material quickly on rough surfaces. In many projects, start rough with a belt sander and finish with an orbital sander for best results.
Your Questions Answered
What is the primary difference between a handheld belt sander and an orbital sander?
The belt sander uses a continuous abrasive belt for aggressive material removal, while the orbital sander uses a random-orbit motion for a finer finish. Your choice depends on the surface condition and the desired smoothness.
The belt sander removes material quickly, and the orbital sander finishes smoothly. Pick based on the surface and the finish you want.
Which sander is best for finishing hardwood floors?
For hardwood finishing, the orbital sander is generally preferred due to its gentle action and ability to prevent deep gouges. Use progressively finer grits for a flawless surface.
For a smooth floor finish, go with an orbital sander and finish with fine grits.
Can I use a belt sander on already finished surfaces?
You can, but it requires caution and experience. Belt sanders can gouge finish if not controlled, so test on a hidden area or scrap and proceed slowly.
Be careful with a belt sander on finished surfaces; test first and go slow.
Are belt sanders safer for beginners than orbital sanders?
Orbital sanders are generally easier for beginners due to their lighter weight and forgiving motion. Belt sanders require steadier hands and more control to avoid gouges.
Orbital sanders are usually easier for beginners. Belt sanders demand more control.
What project types benefit most from a combined approach?
Many projects benefit from starting with a belt sander for bulk removal and then finishing with an orbital sander for a uniform surface. This sequence saves time and improves results.
Use belt for rough work, then orbital for finish for best results.
What safety practices accompany sanding projects?
Always wear a respirator or dust mask, use a dust-collection system, and keep the work area clean. Use hearing protection if the tool becomes noisy and secure long hair or clothing.
Dust control and hearing protection are essential. Keep clothes secure and test tools safely.
Main Points
- Identify project goals before selecting a sander
- Use belt sanders for fast stock removal on rough surfaces
- Opt for orbital sanders when finish quality matters
- Invest in good dust collection and protective gear
- Practice on scrap pieces to perfect technique